Even the slightest elements can have a big impact on your space’s overall look and functionality when it comes to home renovation. The skirting board, a small strip of material that gracefully spans the space between your walls and floors, is one such element that is frequently ignored. Skirting board installation done correctly not only gives your interiors a polished look, but also shields your walls from scuffs, filth, and damage.
Table of Contents
Step 1: Gather Your Materials
Ensure you have all the tools you need before you begin. The skirting boards (either painted or ready to be painted), a measuring tape, a miter saw, an adhesive appropriate for your wall type, a spirit level, a nail gun, and a marking pencil are among these.
Step 2: Measure and Plan
To ensure seamless installation and accurate skirting board fixing precise dimensions are essential. Each wall where you intend to put skirting boards should have its length measured. Consider how any corners, door frames, or other obstructions may affect the length of the skirting boards. Calculate the total length of the skirting board required using your measurements, adding any additional material to account for errors.
Step 3: Cut Miters and Returns
For a smooth appearance in a room with corners, you must cut mitered corners. The skirting boards’ ends should be properly cut so that they fit together perfectly at the corners. Place your miter saw to a 45-degree angle. To add “returns” to open-ended runs, cut the skirting board at a 45-degree angle to provide a finished end that neatly joins the wall.
Step 4: Paint or Finish
Before installing, this is the best time to paint or finish your skirting boards to your desired color, maintaining a high level of skirting board fixing. By doing this, you can rest easy knowing there won’t be any paint splatters on your walls or floors during installation, which will be much cleaner and more effective.
Step 5: Apply Adhesive
Apply thin, even lines of adhesive along the skirting board’s back using an adhesive appropriate for your wall material (concrete, plasterboard, etc.). By securing the board to the wall with this glue, any gaps or uneven surfaces will be avoided.
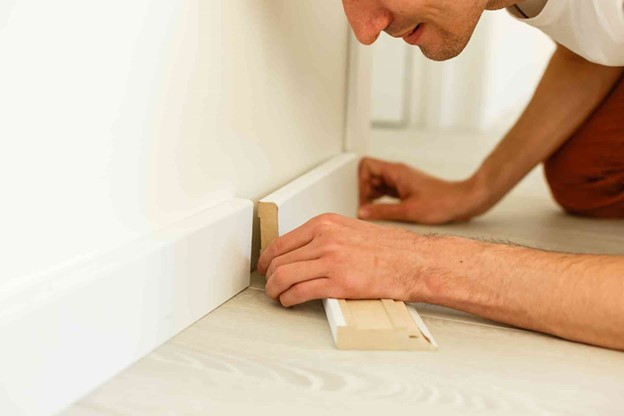
Step 6: Install Skirting Boards
Make sure the skirting board is level both horizontally and vertically before placing it in place. To ensure that the glue attaches properly, press it up against the wall. Slide the two pieces together to form a seamless junction at the mitered corners. Use a nail gun to stab the skirting board into the wall at regular intervals along straight runs to ensure a tight fit.
Step 7: Finishing Touches
Once the skirting boards are securely in place, use wood filler to cover any apparent gaps or nail holes. For a smooth finish, sand down any sharp edges and brush away any extra filler.
Step 8: Touch Up and Enjoy
Finally, do a final touch-up of paint or finish on any filled areas or small imperfections. Once everything is dry, stand back and admire your work! You’ve successfully achieved the perfect skirting board installation, enhancing the elegance and protection of your space.
Conclusion
The skirting board may be a subtle element, but its impact on your home’s aesthetics and functionality cannot be underestimated. By following this step-by-step guide, you’ve unlocked the secrets to achieving a flawless skirting board installation.